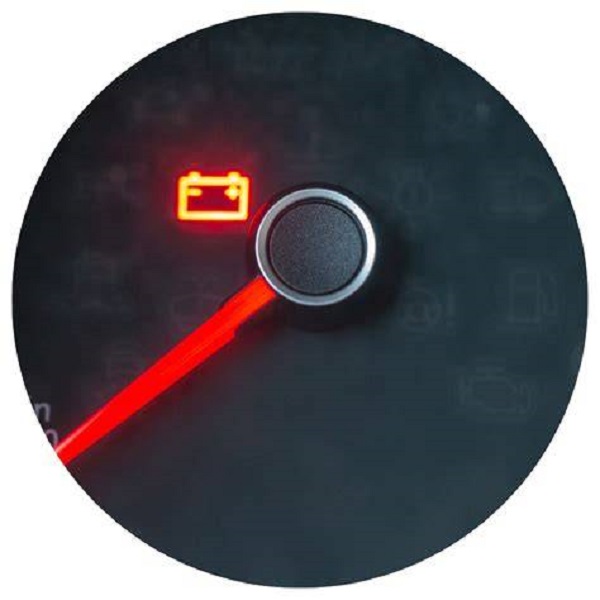
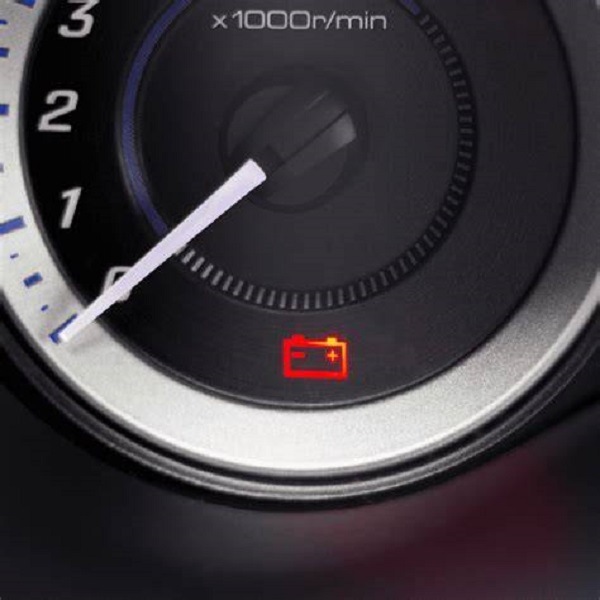
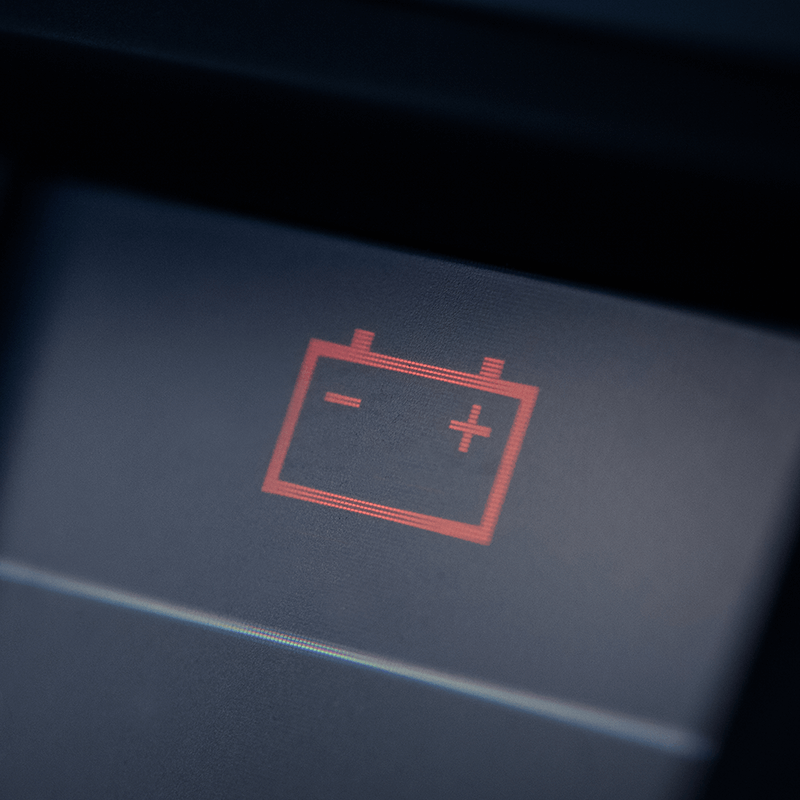
When you glance at your dashboard and notice the battery light on in car, it can be alarming. This seemingly simple indicator plays a crucial role in your vehicle’s health, signaling potential issues that could escalate if ignored. In this comprehensive guide, we’ll explore various aspects of the battery light, from silent symptoms to DIY fixes, ensuring you’re well-equipped to handle this common automotive warning.
 The One ‘Silent’ Symptom That Means Your Battery Light Will Turn On in 24 Hours
Have you ever felt your car acting strangely a day before the battery light illuminates? Often, there’s a subtle change in your vehicle’s performance that precedes the warning sign. Recognizing these silent symptoms can save you from unexpected breakdowns.
Noticing Diminished Electrical Performance
One of the first indicators is a decrease in electrical power. You might find that your headlights are dimmer than usual or that your interior lights flicker intermittently. Additionally, your car’s electronics, such as the radio or GPS, may start to behave erratically. These signs suggest that your car’s battery is struggling to maintain its charge, leading to the battery light turning on within 24 hours.
Unusual Noises from the Engine
Another silent symptom includes strange noises emanating from the engine compartment. These could be grinding sounds when starting the car or a clicking noise that indicates the starter motor isn’t receiving enough power. These auditory cues are your car’s way of warning you about impending battery failure, prompting the battery light to activate soon after.
Increased Engine Idling
If your engine starts idling more frequently or irregularly, it could be a sign of battery issues. An engine that frequently idles may indicate that the alternator is not effectively charging the battery, leading to the battery light warning you within a short timeframe.
By staying attentive to these subtle changes, you can address the root cause before the battery light signals a more serious problem.
 Why Ignoring the Battery Light Might Cost You $1,000+ in Towing Fees
Many drivers tend to dismiss the battery light on in car as a minor glitch. However, ignoring this warning can lead to significant financial repercussions, including costly towing fees.
Breakdown on the Road
When the battery light comes on, it indicates that your car is not charging properly. If left untreated, this can lead to a complete battery drain. As a result, your vehicle may stall unexpectedly, leaving you stranded. Getting roadside assistance can quickly add up, especially if you’re in a remote area where services are limited. The total cost can easily exceed $1,000 when factoring in towing, repairs, and other related expenses.
Damage to the Alternator and Other Components
Neglecting the battery light can also cause damage to the alternator and other vital components. The alternator relies on a functioning battery to maintain the vehicle’s electrical system. Without proper charging, the alternator can overwork, leading to its premature failure. Replacing an alternator is a costly repair that can contribute to the overall expense exceeding $1,000.
Higher Repair Costs Over Time
Over time, the cost of repairing the damage caused by ignoring the battery light increases. Minor issues can escalate into major problems, requiring extensive repairs that strain your wallet. By addressing the battery light promptly, you can avoid these escalating costs and ensure your vehicle remains in optimal condition.
In essence, taking the battery light seriously can prevent exorbitant towing fees and costly repairs, safeguarding both your vehicle and your finances.
The DIY Trick to Temporarily Fix the Battery Light Without Replacing the Battery
If your battery light on in car is flickering, you might be tempted to find a quick fix without replacing the battery. Fortunately, there are DIY tricks that can provide a temporary solution, allowing you to drive safely until you can address the underlying issue.
Checking and Cleaning Battery Terminals
Start by inspecting the battery terminals for any signs of corrosion or looseness. Corroded terminals can hinder the battery’s ability to charge properly, triggering the battery light. Clean the terminals using a mixture of baking soda and water, and ensure they are securely connected. This simple step can often resolve the issue temporarily, stabilizing the battery light.
Resetting the Vehicle’s Computer
Modern vehicles have complex computer systems that can sometimes misinterpret signals from the battery. Resetting the car’s computer might help in clearing any false warnings. To do this, disconnect the negative battery terminal for about ten minutes. This action can reset the system, potentially turning off the battery light if the issue was software-related.
Tightening or Replacing the Serpentine Belt
The serpentine belt plays a crucial role in driving the alternator. If it’s loose or worn out, the alternator may not function correctly, causing the battery light to activate. Tighten or replace the serpentine belt as needed. This DIY approach can temporarily fix the battery light issue, giving you time to seek professional help if necessary.
Using a Multimeter to Check Battery Voltage
Using a multimeter, you can measure the battery’s voltage to determine its health. A healthy battery should read around 12.6 volts when the engine is off and 13.7 to 14.7 volts when running. If the voltage is significantly lower, it indicates that the battery isn’t charging properly. While this is a temporary measure, it can help you understand the severity of the problem and decide on the next steps.
These DIY tricks offer temporary relief from the battery light warning, allowing you to continue driving while you plan for a permanent fix.
The ‘Hidden’ Component That Fails Before the Battery Itself (And How to Spot It)
Often, the issue triggering the battery light on in car isn’t the battery itself but a hidden component that fails first. Identifying this component can save you from unnecessary battery replacements and additional expenses.
The Alternator: The Real Culprit
The alternator is a critical component responsible for charging the battery and powering the car’s electrical systems while the engine runs. When the alternator starts to fail, it puts extra strain on the battery, leading to the battery light activation. Signs of a failing alternator include dim headlights, a dead battery, and strange noises from the engine bay.
The Serpentine Belt: A Silent Failing Part
Another hidden component is the serpentine belt, which drives the alternator. If the belt becomes loose, cracked, or worn out, it can reduce the alternator’s efficiency, causing the battery light to come on. Regular inspection of the serpentine belt can help spot signs of wear and prevent related issues.
The Voltage Regulator: Managing Electrical Flow
The voltage regulator controls the amount of voltage sent to the battery. A malfunctioning regulator can either overcharge or undercharge the battery, both of which can trigger the battery light. Symptoms of voltage regulator issues include fluctuating battery voltage and overheating of electrical components.
How to Spot These Hidden Failures
- Listen for Unusual Noises: A failing alternator or serpentine belt often makes squealing or grinding noises.
- Monitor Electrical Performance: Dimming lights or erratic behavior of electronic systems indicate potential alternator problems.
- Check for Excessive Heat: Overheating of electrical components can signal voltage regulator issues.
- Perform Regular Inspections: Regularly inspect the serpentine belt and alternator for signs of wear and tear.
By keeping an eye on these components, you can identify the true cause behind the battery light and address it before it leads to more severe problems.
 How to Diagnose the Battery Light Issue Without Paying for an Expensive Scan
Diagnosing the reason behind the battery light on in car doesn’t always require a costly diagnostic scan. You can perform several checks yourself to identify the problem effectively.
Visual Inspection of the Battery and Alternator
Begin by inspecting the battery for any visible signs of damage, such as cracks, leaks, or corrosion on the terminals. Next, examine the alternator for loose connections or worn-out parts. A thorough visual inspection can help identify obvious issues that might be causing the battery light to appear.
Using a Multimeter to Test Electrical Components
A multimeter is a valuable tool for testing the health of your battery and alternator. To test the battery, ensure the car is off and check for a voltage reading around 12.6 volts. Start the engine and look for a reading between 13.7 and 14.7 volts, indicating that the alternator is charging the battery correctly. If the voltage doesn’t increase when the engine is running, it suggests an alternator issue.
Checking for Parasitic Drain
Parasitic drain occurs when electrical components continue to consume power even when the car is turned off. To check for this, disconnect the negative battery terminal and connect a multimeter in series. A significant drain indicates that something is drawing power unnecessarily, which can lead to the battery light turning on.
Inspecting the Serpentine Belt Tension
The serpentine belt’s condition and tension directly affect the alternator’s performance. Ensure the belt is tight and free from cracks or fraying. A loose or damaged belt can reduce the alternator’s efficiency, triggering the battery light.
Reviewing Dashboard Warning Messages
Modern cars often display warning messages alongside the battery light. Pay attention to these alerts, as they can provide additional clues about the underlying issue, such as low battery voltage, alternator failure, or other electrical problems.
By following these diagnostic steps, you can identify the cause of the battery light without incurring expensive scanning fees, saving both time and money.
The One Mistake 90% of Drivers Make When Jump-Starting a Dead Battery—and How to Fix It
Jump-starting a dead battery is a common solution when the battery light on in car comes on. However, many drivers make a critical mistake during this process, potentially causing more harm than good.
Incorrect Cable Connection
The most common mistake is connecting the jumper cables in the wrong order or to the wrong terminals. For instance, attaching the positive cable to the negative terminal first can create a short circuit, leading to sparks or even damaging the vehicle’s electrical system. Always ensure that the positive cable connects to the positive terminals and the negative cable to the negative terminals to avoid this error.
Failing to Let the Dead Battery Charge
Another mistake is not allowing sufficient time for the dead battery to charge. After connecting the jumper cables, it’s essential to let the assisting vehicle run for several minutes before attempting to start your car. This waiting period ensures that the dead battery receives enough charge to start the engine without causing undue stress on either vehicle’s electrical system.
Not Checking for Battery Damage
Attempting to jump-start a severely damaged or old battery can be dangerous. Cracked or leaking batteries should never be jump-started, as they pose a risk of acid spills and explosions. Always inspect the battery for signs of damage before proceeding with a jump-start.
Overlooking Safety Precautions
Neglecting basic safety measures, such as wearing protective gear or ensuring the vehicles are in park and turned off before connecting cables, can lead to accidents. Adhering to safety protocols is crucial to prevent injuries and equipment damage during the jump-start process.
How to Fix This Mistake
- Follow the Correct Sequence: Always connect the positive cable first, followed by the negative cable.
- Allow Sufficient Charging Time: Let the assisting vehicle run for at least five minutes before starting your car.
- Inspect the Battery: Ensure there are no cracks or leaks before attempting to jump-start.
- Adhere to Safety Guidelines: Wear protective gear and follow all safety instructions diligently.
By avoiding these common mistakes, you can safely and effectively jump-start your car, preventing further issues related to the battery light.
 Why a ‘New Battery’ Might Still Trigger the Warning Light (And What to Do Next)
Installing a new battery is a logical step when the battery light on in car appears. However, there are instances where a new battery alone doesn’t resolve the warning light issue. Understanding why this happens can help you take further action.
Faulty Alternator
Even with a new battery, a faulty alternator can prevent the battery from charging correctly, causing the battery light to remain on. The alternator’s role is to maintain the battery’s charge while the engine runs. If it’s malfunctioning, the new battery won’t receive the necessary charge, keeping the warning light active.
Loose or Corroded Connections
Sometimes, the issue lies not with the battery or alternator but with loose or corroded connections. Poor connections can disrupt the electrical flow, leading to the battery light staying illuminated despite having a new battery. Ensuring all connections are clean and secure is essential for the system to function properly.
Parasitic Electrical Drain
A parasitic drain from an accessory or electrical component can continuously deplete the battery, making it difficult for the new battery to maintain charge. Identifying and addressing the source of the drain is crucial to prevent the battery light from turning on again.
Faulty Voltage Regulator
The voltage regulator controls the voltage output from the alternator to the battery. If the regulator is faulty, it can result in improper charging, causing the battery light to stay on even with a new battery installed. Testing and replacing the voltage regulator may be necessary to resolve this issue.
Next Steps After Installing a New Battery
- Inspect the Alternator: Ensure the alternator is functioning correctly by testing its output with a multimeter.
- Check Connections: Verify that all battery terminals and connectors are clean and tightly secured.
- Identify Parasitic Drains: Use a multimeter to detect any abnormal electrical drains from the vehicle’s systems.
- Test the Voltage Regulator: Confirm that the voltage regulator is operating within the recommended parameters.
By addressing these potential issues, you can ensure that the battery light remains off and your vehicle operates smoothly with the new battery.
 Conclusion: Taking Charge When the Battery Light On in Car Illuminates
Encountering the battery light on in car can be daunting, but understanding its causes and solutions empowers you to take proactive measures. From recognizing silent symptoms and avoiding costly towing fees to implementing DIY fixes and identifying hidden component failures, each step plays a vital role in maintaining your vehicle’s health. Additionally, avoiding common jump-starting mistakes and ensuring that a new battery installation addresses all underlying issues further safeguards your car’s performance. Finally, embracing maintenance hacks can prolong your battery’s life, offering peace of mind and reliable transportation. By staying informed and responsive to the battery light, you ensure that your vehicle remains in optimal condition, ready to drive whenever you are.